Curved glass can turn a straightforward window-film job into a precision installation. Knowing how to tint curved windows matters because film naturally wants to lie flat, while curved glass asks it to stretch, shrink, and conform without leaving fingers, creases, or visible distortion. The right process protects the finish of the glass, preserves the film’s performance, and creates the clean appearance homeowners and commercial property managers expect.
For large architectural windows, bay windows, curved storefront panels, and rounded glass features, patience and material selection matter as much as technique. A poor installation may look acceptable on day one, then lift at the edges, form bubbles, or show stress marks once heat and sunlight reach the glass.
Why curved windows are harder to tint
Flat windows allow film to be cut, wetted, positioned, and squeegeed into place with relatively little resistance. Curved glass introduces excess material. On a gentle single-direction curve, the film may settle with controlled heat shrinking. On a compound curve that bends in more than one direction, such as certain automotive glass or highly sculptural architectural panels, a single piece of film may not conform cleanly at all.
The challenge is not simply getting the film onto the glass. It is managing the film’s tension while avoiding overstretching. Pulling film too aggressively can create optical distortion, weaken the adhesive bond, and produce pale stress lines that become more obvious in strong daylight.
For buildings in hot, high-sun environments, this precision is especially relevant. Solar-control film is expected to reduce glare, help manage heat gain, and block UV exposure. Those benefits depend on a properly bonded, undamaged film surface.
Start by assessing the shape and glass
Before selecting film or preparing tools, inspect the window carefully. Identify whether the glass has a simple curve, a compound curve, or multiple curved sections divided by frames or mullions. A gentle bow across one direction is usually more manageable than glass that curves both vertically and horizontally.
Also check the glass condition. Chips, edge damage, old adhesive residue, scratches, and failed seals should be addressed before tinting. Window film will not conceal every existing flaw. In fact, reflective, dark, or privacy films can make surface defects more noticeable under certain lighting conditions.
Glass type is equally important. Some insulated units, coated glass, laminated panels, and specialty glazing need a compatible film recommendation. Film changes how solar energy is absorbed and reflected, so the wrong combination can increase thermal stress. This is one reason curved architectural glass deserves a professional assessment rather than a one-size-fits-all approach.
Choose a film that suits curved glass
Film choice affects both installation difficulty and long-term results. Thick security films, heavily textured decorative films, and certain high-performance films can be less forgiving on tight curves. Thinner, quality films often shape more easily, but performance should never be sacrificed simply to make installation easier.
For residential and commercial windows, consider the purpose first. Solar film is suited to rooms affected by afternoon heat and glare. Frosted or decorative film works well for privacy on curved partitions, entry panels, and interior glass. Blackout film is useful when complete visual blockage is required, although it must be selected carefully for the specific glass type and environment.
A premium film with a stable adhesive system is worth the investment. Lower-grade materials may shrink unevenly, discolor, or lift at the edges, especially where curved glass receives repeated sun exposure and heat cycling.
Prepare the glass with exceptional care
Cleanliness determines whether the adhesive bonds evenly. Curves create edges and angles where dust, lint, and cleaning residue can collect, so preparation must be more thorough than it is on a flat pane.
Use a clean, non-abrasive glass-safe cleaning solution and a new scraper blade where appropriate for the glass. Remove stickers, old film adhesive, paint specks, silicone traces, and grease. Then wipe the surrounding frame, seals, and ledges. Debris from the frame can wash back onto the wet glass during installation and become trapped beneath the film.
A controlled, low-dust working area is ideal. Turn off fans or air-conditioning vents blowing directly at the glass, and avoid cutting or handling film near dusty surfaces. Even a tiny piece of lint can stand out on a smooth curved panel, particularly with darker tint shades.
How to tint curved windows with controlled heat
The key technique for a simple curved window is controlled heat shrinking. This is not the same as heating the film until it forces itself into place. The goal is to reduce excess material gradually and evenly before final installation.
Measure generously and make an outside pattern
Place the film on the outside of the glass first, with the liner facing the correct direction for your chosen method. This gives you a working pattern without exposing the adhesive. Leave extra material around the edges rather than cutting to the final size immediately.
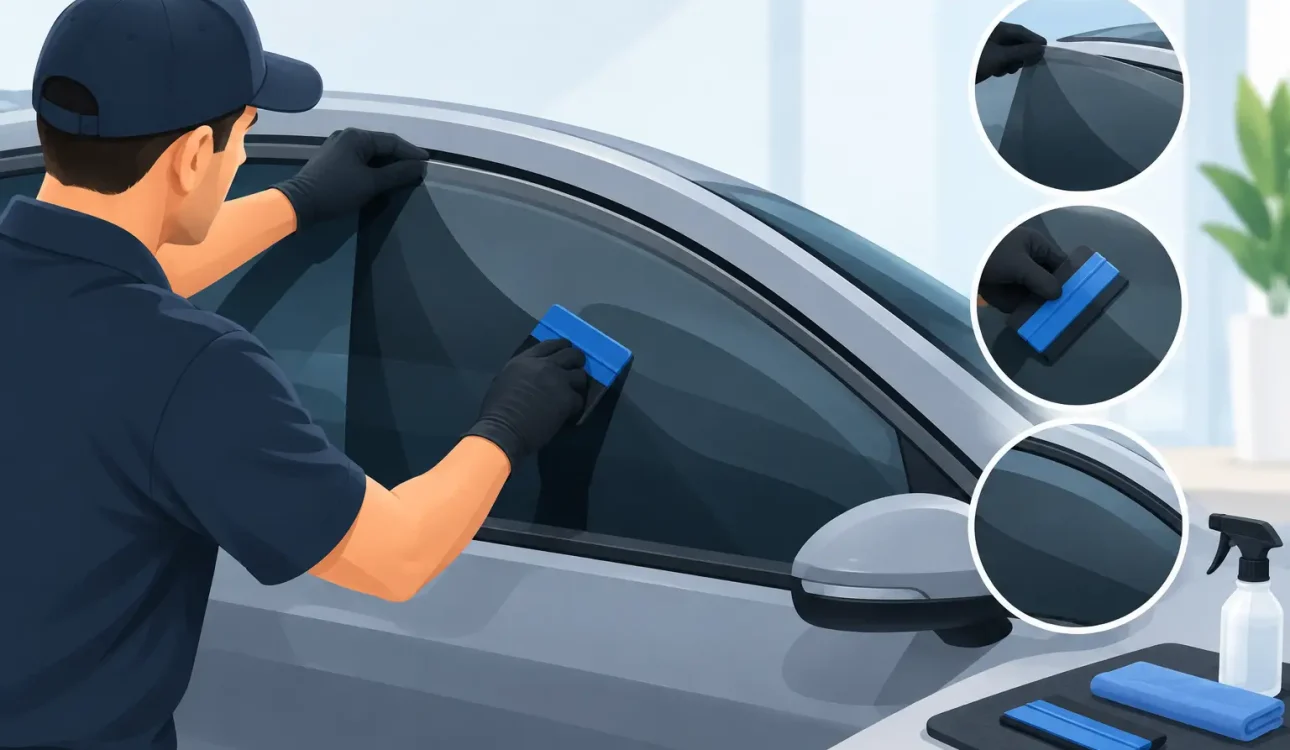
Mist the outer glass lightly so the film can be repositioned. Use a firm squeegee to establish the film’s natural tension and identify where fingers, or small raised ripples, are forming. These fingers show where the material needs to be shaped.
Shrink small areas, not the whole panel
Use a professional heat gun at a safe, controlled distance. Keep it moving continuously and work in small sections. Directing prolonged heat at one spot can scorch the film, create haze, or stress the glass.
As heat relaxes the film, use a heat-resistant card or squeegee to guide the excess material toward the edge. Work from the center outward, addressing one finger at a time. Do not chase large ripples randomly across the panel. That usually redistributes tension instead of removing it.
If the film continues to form large fingers in several directions, stop and reassess. It may be a compound curve that requires a different installation approach, a relief seam in an appropriate location, or a film designed for more complex shaping. Forcing a single sheet onto an unsuitable curve rarely produces a durable result.
Transfer the shaped film inside
Once the outside pattern lies flat, trim it slightly oversize and prepare the interior glass with a slip solution. Remove the liner carefully while keeping the adhesive wet and free from contamination. Position the film on the inside surface, where it will be protected from weather and external abrasion.
Squeegee from the center toward the edges using overlapping strokes. On curved glass, firm but controlled pressure is better than a hard, fast pass. The aim is to remove solution while maintaining even contact across the curve. Finish with a smaller hard card wrapped in a lint-free cloth to work the perimeter.
Trim and edge-finish for long-term adhesion
Clean edges are not merely cosmetic. Film that is cut too close to the frame may bind, while film left too large can catch moisture and lift. Use a sharp blade, stable cutting guide, and a narrow clearance from the gasket or frame so the finished edge can dry properly.
After trimming, make a final pass along the edges to remove trapped moisture. Inspect from several angles, both inside and outside. A panel can appear perfect in shade but reveal contamination, fingers, or uneven reflection in direct light.
Do not judge the installation too early. Most films need time to cure, and a mild water haze or small moisture pockets can be normal during the early drying period. Cure time depends on film type, weather, glass temperature, and humidity. Avoid cleaning the film until the installer-recommended curing period has passed.
Common mistakes that cause bubbles and creases
The most common problem is trying to install a flat-cut piece directly onto a curved pane without pre-shaping it. Other avoidable mistakes include overheating one area, using dull blades, applying film onto poorly cleaned glass, and trimming before the film has fully settled into position.
Another issue is choosing tint based only on darkness. A darker film may improve privacy and glare control, but it is not automatically the best heat-control solution. Film performance should be evaluated by its solar rejection, visible light transmission, UV protection, reflectivity, and compatibility with the existing glass.
For tightly curved, expensive, or highly visible glass, professional installation is usually the more cost-effective choice. Replacing wasted film, correcting trapped contamination, or removing failed adhesive often costs more than getting the application right the first time.
When to call a window film specialist
A specialist is particularly valuable when the glass is oversized, curved in multiple directions, difficult to access, part of an insulated glazing system, or exposed to intense daily sun. The same applies when a business needs consistent tint appearance across a curved storefront or office partition.
An experienced installer can assess the glass, recommend a compatible film, plan seams only where necessary, and use heat-shrinking methods that preserve optical clarity. ShieldShade International applies this level of care to solar, privacy, frosted, decorative, and reflective film solutions, with recommendations tailored to how each space is actually used.
A curved window should remain a design feature, not become the reason a tint job looks compromised. With compatible film, careful heat control, and a disciplined installation process, you can improve comfort and privacy while keeping the glass looking clean, smooth, and intentional.